Saturday, November 20, 2010

Wheels turning

Exciting news today! We finally got the motor and transmission mounted into the car. The transmission is bolted in at two spots and James is going to make a bracket for the motor mount. The motor is attached to the transmission and is sitting on some pieces of wood and the jack is under it as well. Once he makes the bracket we can attach it to the motor mount and that part of the job will be done.
Motor/Tranny mounted
Plenty of space to the right of the motor. I could have gotten the Warp 9 instead of the Impulse 9.

 One of the critical issues today was something I have been worried about for a while. I didn't know how much clearance I had between the motor and the CV joint on the half shaft. There is about 1/4 inch gap between the motor and CV joint and less than an 1/8th inch between the CV joint and the aluminum adapter plate. This is not the greatest shot of it, but you can sort of see it is a pretty tight fit, but will work.
CV joint, Motor and Adapter plate

The greatest part of today was testing the motor with it mounted in the car. It was only a 12Volt test, but it was nice to see the wheels turn. Everything spun smoothly, even without transmission oil.

I will now move on to planning the electronics board which will be mounted over the motor. Probably on a piece of aluminum with piece of lexan on the bottom to isolate the high voltage wiring from the body of the car if a wire comes loose. Also, I will order the aluminum sheets for making the battery boxes. James may be able to cut and bend them at his school, but if not, I will have a metal shop guy in Burbank do it.

Thursday, October 14, 2010

Yeah, a new post

September was frustrating. I didn't get the batteries from China because the third party importer misplaced my order. I hope to get them in November at some point. Hopefully sooner than later. The adapter plate and coupler arrived, but the mounting holes for the motor were wrong  for my motor. James came over and drilled new holes so that should be OK now. The transmission shaft is too long, so I purchased a little pneumatic metal cutter and James came over again, and cut the shaft down. It is almost the right length now. I think we need to take another 1/8" off or so. I am a little concerned the Motor shaft is actually too long and the coupler is hitting the back wall of the transmission bell housing which would mean we would have to cut a bit off the motor shaft or add spacers between the motor and the adapter plate. Not sure I want to do either, but a decision will have to be made this weekend.

We are moving to a rental house next week so life is much more complicated at the moment. It is tough trying to fit any time in for the conversion. I am really hoping once I get the motor mated to the transmission and installed in the car, I will pick up some speed. Then I would need to start laying out the board for all the electronics and start creating the battery boxes as well as cutting holes in the hatch for installing the boxes. Still a lot to do, but to see the motor and tranny installed and see the wheels spin would be very motivating at this point.

Tuesday, August 31, 2010

The excitement is growing

Tested the controller with the motor tonight. James came over and we got the motor out, set it up and then hooked up the controller. Amazingly, it worked! Here is the video. Enjoy!


Incredible end to the day. I still need to redo one bolt on the controller and do some work to button it up, but wow, I am still amazed it worked. Still along ways to go to get the car moving, but a great first step.
Special thanks to Paul Holmes and Adam Brunette for the controller design, kit, software and trouble shooting help.

Monday, August 30, 2010

Controller update

I finished the power section and joined the brain with it. All of the soldering is done. I am in the process of testing it now before I hook it up to the motor. As far as I can tell, it is performing as expected. I am waiting on a reply from one email about how to tell if power is leaving the controller correctly. Once I find out how to measure that, then I will hook it up to the motor and and watch it spin. No magic black smoke has escaped from it yet so that is a very good thing.


Here are a couple more pics.
Just need the cover and the end caps
Mosfet Side
Capacitor side


Hopefully James can come over tomorrow or Wed. evening and we can get the motor out of the box, set it up and try out the controller. I cannot express how exciting that will be!

Tuesday, August 24, 2010

Power Electronics

I made some progress last weekend on my controller. I soldered most of the high voltage power components and here are some nice photos of it. I was a little afraid to do this step for a while since I had never soldered larger components before, but it seems like I did fine. When I finish assembling the whole controller I will hook it up to a small battery and start testing it to make sure it is working properly.
It is a bit more beefy than I thought it would be, which is a good thing
Close up of the Mosfets - The pads I haven't soldered yet are for the resistors that connect the power section with the brain
Diodes on the left and Capacitors on the right
Soldering on the back side of the board

I need to get some thermal grease for the base plate and a good glue that can withstand heat to glue a couple components down, then I should be ready to put the whole thing together with the brain section and put it in the case. I had hoped to be almost down with this project by now, but as these things go it takes a lot longer then expected, especially if you have a full time job and a family. It also doesn't help that I have never done any of this before so I am unsure about stuff and hesitant to jump in at times. My new goal is to get it done by the end of the year and start the new year with the EV Grin :)

Tuesday, August 10, 2010

Photos of Transmission, clutch hub and wrong adapter plate

I am posting these photos so I can easily link to them for the guys who are going to re-do the adapter plate and coupler.
Adapter plate held against the transmission
Left holes of Adapter plate don't line up
Clutch disk
Clutch disk with coupler - Note size difference of Spline
I think the coupler is only an 1/8" off, but I am sending my clutch disk along with a tracing of my bell housing back to them. Maybe in a week and a half or so I can start mating these parts. In the mean time, I need to finish building the controller, so I need to make a trip to Fry's to get some larger solder for the power board. Also, I really need to sit down and make a list of the things that need to be done and then put them in some sort of sensible order, so we can start moving down the list and checking things off.

Sunday, August 8, 2010

Adapter plate

Here is a pic of the adapter plate that is not quite right. I think they found an 86-87 CRX Si or DX and thought it would match, but I have an HF which is lighter and a smaller engine. I will be sending my clutch disk and an outline of the bell housing with some measurements this week. Hopefully I will then get a properly sized adapter plate and coupler so the major work can begin.

Coupler

I received my adapter plate and coupler this week, but it looks like they had a different tranny than mine, so I have to send them back. Here are a few photos of the Lovejoy coupler. I am not sure if it will work for my freeway speed conversion.

It looks heavy duty, but don't really know a lot about this part of the process. I am seeking any advice I can get.

Note- This is not a Lovejoy coulpler. It is half of a Lovejoy coupler welded to a disk, and the spline which mates with the transmission.

Friday, July 23, 2010

Looky what I found!

Nice packages arrived this week. Here is a looksy for you all. Some of it was larger than I thought it would be. I knew it would be bigger than your everyday electronics, but a few things kinda stood out. I have included a quarter to compare. The Contactors and the 500amp 300 Volt fuse were the biggest surprises.

Netgain Impulse 9" Electric Motor
Netgain Speed Sensor
Anderson SB 350 Connectors
Inertia Switch
6 Blade Fuse Holder
500 Amp 300 Volt Fuse Holder
500 Amp 300 Volt Fuse
20 Amp Fast Acting Fuse w/ Holder

Relay 
One of the two Contactors
VBS Braking Unit Vacuum Pump
500 Amp Shunt
Curtis PB-6 PotBox
Iota DLS-55 DC/DC Converter
Elcon PFC 2000+ Battery Charger
Welding Cable and Heat Shrink

I am now waiting for the adapter plate and of course the batteries. The adapter plate should be here next week, but the batteries won't get here until at least the end of August. There is plenty to do in the mean time. Lots of design, cutting, fabricating, welding, etc. Get ready James, because now we have a serious job to do.

Saturday, July 3, 2010

Clean up Clean up

I did a little cleaning today. Gotta get all that horrible grease and oil out of the engine bay so when we start installing the electric components they will stay nice and clean while we do it. About a month ago, I also manually cleaned up the transmission. Here are a few photos.
Before
After
Before
After

I received the battery charger a few days ago, but I need to send it back because it was setup for 40 batteries and a 3.8Volts/cell and I wanted 38 batteries and 3.65volts per cell. I should get it back in a week or two I'd imagine. I may get a lot of the other parts about the same time, so the real planning will begin. I have to figure out how to mount the new motor using the existing motor mounts, then design a battery rack for the engine compartment, as well as cut a hole in the hatch floor and design a battery box to put in it. Also need to figure out where and how I am going to mount all the other components like the controller, DC/DC converter, Vacuum pump for the brakes, fuses and contactors, etc. I also need to run some tubing from the engine bay to the hatch, along the path the exhaust used to take, for the battery cables. Figuring out how to use the existing electrical wiring for accessories like lights, windshield wipers, etc, will be a fun task as well. Hopefully most of it still works.

Wednesday, June 23, 2010

Parts are ordered

I got my parts ordered as well as the batteries. I ended up going with 38 Thundersky 160ah batteries for  approx. 120 volts. This will give me enough range to get to work and back if for some reason I can't charge at work. Also, my car should have pretty decent power with my controller running at 500 amps. If I got some bigger fuses, I could run up to 700 amps, but that would drain the batteries pretty quick. I ordered everything from Justin at www.evolveelectrics.com. He was very helpful and quick to respond to emails and changes in the order.

Here is a list of the parts:

DRIVE SYSTEM
Netgain Impulse 9 Motor - Double shaft- Set up for clockwise rotation for the Honda
Netgain Warp Speed Sensor - for the Tachometer and speedometer
Curtis PB-6 Potentiometer - connects to the gas peddle to tell the controller how much battery juice to feed the motor
2 Albright SW-200 Contactors - wired to the ignition to close the circuit from the batteries to the controller
Clutchless Transmission adapter plate - I decided to go clutchless - a little tougher to change gears but I think it will work out fine
BATTERY SYSTEM
Elcon PFC-2000+ Charger - Battery charger - 115VAC at about 12amps - I think about 5.5 hours to charge 40% of the pack which is more than I will use at one time.
6 feet of 6AWG Welding cable - power from the plug to the charger
30 feet of 2/0 Welding cable - running between the battery packs, motor, controller and safety devices
Various Heat shrink and Lugs - for power cable
500Amp Ammeter - This measures amps going from the batteries to the motor
60-160V Voltmeter - This measures the battery pack voltage
500Amp Shunt - this lowers the power going to the above meters so they don't blow up
40 Thundersky 160 Ah batteries and connectors - I will be running 38 and have 2 spares
SAFETY SYSTEM
VBS braking kit - This is a vacuum pump which creates the vaccum needed for the power brakes to work
IOTA DLS-55 DC to DC converter - This changes the voltage from 120Volts to 12 volts to charge the accessory battery
Ferraz 500amp 300VDC Fuse - Going over 500 amps will shut the car down - I will set my controller to limit the amps to 480amps
20amp Fast acting Fuse and holder - for 12volt accessory system
First Inertia switch - If I get in an accident, the inertia switch cuts power to the system
2 Anderson SB-350 2/0 connectors - for the battery system - manual disconnect to service the car
2 Anderson SB-50 6AWG - for the charger system - manual disconnect to service the car
12Volt 40 amp relay - for the ignition system

So, it is alot of parts, but nowhere near what a gas powered vehicle needs, and not nearly as many moving parts which is what causes failures in gas powered vehicles.

I will be eagerly anticipating receiving them and also continuing work on the DIY controller.  Depending on how long the batteries take to get here from China, I could be up and running in a couple months. This also depends on the schedule of  MECHEN the mechanical god (James) who will be helping me figure out how to put this all together and attach it to my car.

Tuesday, June 1, 2010

Exciting News

So I finally finished the control board section of the controller. I took it out to the garage and wired it up to a 12V car battery and just like that, the green light lit up and the yellow light was flashing just as it should. A great sense of relief  and excitement hit me. I really did not want to have to figure out what component might be faulty or I burned up, or have to order another control board and start the soldering all over again. I will also try to hook it up to my PC tomorrow and run a little diagnostic program on it to make sure the chips are working properly. Then, I will move on to the power section of the controller. I have been putting off ordering the rest of the parts for the car because I can not seem to make up my mind about the battery pack. I want to go with the lower cost of the 4 packs, but am afraid I won't get the cycle life or the power out of them that I want. The difference is about 10-30% more between the 3 larger packs, so maybe I go with one in the middle.

Wednesday, May 19, 2010

Will this project ever move forward?

So, my work got very busy at the end of April and beginning of May and I have just started to recover. Not much has happened with the ERX except that I have once again bounced around the idea of what type of batteries I should use, and in the end again I came to the same conclusion as before. I will still be going with LiFePo4 batteries. One exciting thing I did do was I started to solder my DIY controller. The controller is called Open ReVolt and was developed by Paul Holmes and sold at www.paulandsabrinasevstuff.com. His development thread is on ecomodder.com. When I started soldering, it was a little nerve racking, but after I did a few components I managed to feel more confident about my skills and just about finished off the control board portion of the kit. I need to buy one more piece at Fry's and solder a couple connectors and wires . I am not sure if there is a way to test it out, but there is PC software you hook it up to so you can check to see if the main chip is running properly. There are also a couple LEDs that come on when it is powered up, so hopefully I get some nice lights and not smoke when I apply the voltage.

 Closeup of Control board for the Open ReVolt controller about half finished


 I can't believe I have done this - Hope it works

Since these photos were taken, I have put in all but one of the IC chips and one transistor. Maybe this weekend I will spend some time with ERX. I am also ready to purchase the motor and other needed components. I will be doing that research this week and maybe order by weeks end. I may order the batteries as well. Now, that would be very exciting since they are the largest cost and the biggest thing I've wrestled with in this process.

Sunday, April 11, 2010

Gas tank and tranny removal

I know, I know, it has been a few weeks, but I was busy, and then easter, and then.... Well, James came over yesterday and we started on the removal of the gas tank. I should say HE removed the gas tank while I watched and learned. I did help pull the muffler and cat out and I was a good flashlight holder. The gas tank filler pipe was the most troublesome part to remove, but he got it outta there. He also removed the transmission and clutch from the engine block. The flywheel bolts were tough but he figured out how to get the proper leverage on one side to keep it from turning while he torqued the bolts the other way. If we had an air wrench then this would have been a non-event. If you are ever thinking about doing this, having a buddy who knows what he is doing is pretty much necessary. I might have been able to do some of this on my own, but it would take 5 times as long and I would be questioning myself the whole time about whether I am doing it right or not. When we get to the electric motor installation part I will have to elevate my game, kinda like the Lakers will have to do if they want to get out of the first round of the playoffs. Zing!! OK, back to the task at hand. Here are some new photos of the pieces that were removed.

 Clutch and Starter

 Dirty Transmission

 Gas tank, Exhaust pipe with muffler and Cat along with various other unwanted parts

 I am cleaning up the transmission now and oh yeah I forgot, I am getting the parts for the controller in the mail this week. Super excited about this! Props to Paul and Sabrina for the incredible open source DIY controller saving me $1000 if I can build it without screwing it up.  I still need to go to Fry's and get some cheap components so I can practice soldering before I attempt to build my controller.

EV Tribute Video

Here is a video I made as a tribute to EVs. Enjoy!


All of the cars in this video are or will soon be 100% electric. Except of course the Maserati and others which are getting smoked by the "White Zombie" at the end of the video.

Monday, March 29, 2010

Clean up

I haven't posted in a bit, so I thought I would update today. I have had a couple busy weekends, so no progress made on the car yet. On Saturday March 27th I cleaned the garage quite a bit and also put the car up on jack stands. For anyone who is used to working on cars this may have taken 20-30 minutes, but since I had never done it before I was a bit nervous. I checked the internet and put a couple jacks in place, but then checked the internet again for my specific car and got some better instructions. All in all it took me about three hours. I could not get the back end up as high as I wanted so I found a couple 2x4s that were nailed together and put that between my jack and the jack point. It helped a bit but it is still not as high as I want. That is all that has happened. My work is getting very busy right now, so research on the net during work is limited. I still haven't called to get price quotes on package systems. Need to find some time.

Monday, March 15, 2010

Removing the ICE Pt. 2 - James is the Man

Mechen and a simple human

James came over on Saturday and brought a hoist, so we jacked up the car and he figured out how to remove the drive axles. I guess we could have read the manual, but as I have stated before, he can figure out anything. Me, on the other hand, can't figure out how to move multiple pictures around this blog, so I only have one up right now. I have three more pictures and a small video to add later tonight. Anyways, back on topic, James brought a heavy duty strap and wrapped it around the engine since it was missing a hook. This worked great. I don't know how I would have done this on my own. James is incredible and he loves to do it. He should be called Mechen, as he controls the mechanical universe. So now that I have propped James up and made him a god, I'll get on with my post. With the engine all strapped in and the exhaust and drive axles removed, it was just a matter of pulling the chain and hoisting it up out of the engine bay. We lowered the car back down and I pushed  it back while James lifted the engine a bit to get over the front crossbar. Success!!


Next we will need to remove the fuel tank, fuel lines, and any wiring, or tubing related to the engine. After that I will need to clean the engine bay up a bit. I also need to clean the garage some more in order to create enough space to permanently roll the car in and jack it up. Sometime in the next week or so I may call up a few EV parts suppliers and get some quotes on a package deal. That's it for now.


Sunday, February 28, 2010

Removing the ICE Pt 1

I purchased a new 12volt accessory battery and a couple pans for emptying the oil, coolant and transmission fluid. Between downpours I tried to run the car until the gas was gone so we could begin removing the Internal Combustion Engine. At one point I started to see steam coming from the hood, so I shut it down. The coolant reservoir was empty. My buddy James was coming over in a couple hours, so I just let it sit and waited until he came by. He said we can start removing components and he'll empty the gas tank when we get that far. OK, let's get started.

Air filter assembly was first then some air hoses and electrical. Next was the radiator, more hoses, more electrical, throttle cable, clutch cable. Not sure what its called but it is a vacuum system that feeds air to various parts of the motor to open and close valves. Its the black box sitting on top of the engine in the picture below. James knew exactly what to do and did a lot of it. I took mental notes and bagged up bolts and parts. We left the oil in the engine and will remove that at a later time. The manifold was unbolted from the exhaust system. One side of the engine is missing the hook for chaining it up and removing the engine, so I don't know what we are going to do there. James is incredibly talented, so I am confident he will figure out a way to make it work. All we need to do now is jack it up, disconnect the drive axle from the tranny, hook up the engine to a hoist, undo the mounts, and pull it out. I need to order the jacks, so this will have to wait until either some evening this week, or next Sunday afternoon. Also, James removed the fuel pump and manually pumped the remaining gas into my oil pan. Luckily there wasn't much left, maybe a half gallon or so.

We started talking about the transmission and clutch and how it would interface with the electric motor. I told James that I need to get an adapter plate made, and he said he could do it. Really? He said he has access to some sort of plasma cutter? or something like that...not sure what it does but I am guessing it cuts metal. Well, if I can get a design from someone who already has one made, then he could make it and that would save 7 or 8 hundred bucks.

After much thought and buggin the heck out of people on diyelectricvehicles.com I think I have concluded that my battery pack will be more expensive then originally planned, but it will make for a much better car. I think I am going with (45) CALB(formerly known as Prince... I mean Sky Energy) 100AH LiFePo4 batteries. I have seen a couple graphs that show they hold up a bit better under larger current pulls which is what I will be doing when going 70mph for most of my commute. I will be charging at home and at work so I will only use about 50% of the batteries on a regular basis. If I need to run some errands, then I have more juice available. My total range at 70mph will be about 32 miles. I don't plan on ever pushing it that far, but if it didn't charge at work for some reason and I needed to limp home I could do it. Top speed should be....well over the speed limit(probably triple digits). Since these batteries can handle 300-400 amps for extended periods, I should have pretty good acceleration as well considering my car will only weigh about 2150 lbs. with me in it.

Monday, February 22, 2010

Starting to organize

No takers so far on the engine, so I may have to lower the price. I would really like to start removing it this weekend. Hopefully the weather will be decent. I took some video of the engine starting, idling, revving and stopping so I can send that to potential buyers if they want to see it once we start dismantling the car.
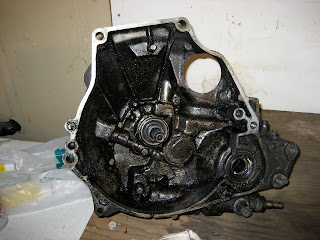
I started my build notebook and also downloaded the Honda factory manual for a 1987 Civic. It should be pretty close to what I need for ERX. I also have a Haynes manual. I wanted to do something this weekend, so I pulled out the passenger seat, and took off the hood and grill. A friend is letting me use a solar charger and so I hooked it up to my dead battery and it started charging right up. It worked great even though it was partially cloudy. It got enough juice in there to start the car up a few times at least. I wonder if I can make due without a DC/DC converter and just bring the solar charger in the car and put it in the dash during the day. Hmmm

Wednesday, February 17, 2010

ICE and Controller

Looked at the car again last weekend. The engine seems like it is running well. Not sure what we heard last time. My buddy James says there may be too much oil in it and the oil is a bit old. Maybe I'll change the oil before showing it to anyone to sell. It is exciting though that I will be listing it tomorrow or Friday on craigslist. Hopefully I'll get a few people to come by this weekend and check it out, then James and I will pull it the following weekend.

Also, I ordered the Open ReVolt controller from Paul and Sabrina yesterday. I asked Paul about a higher amp version so the controller will be able to handle upgrades I may do in the future and he said it was another $50 for the 700amp version. So, for $690 I will have a 144V 700amp controller which saves me about $1000 on the controller budget. I am about to buy a soldering iron on ebay and I ordered a heavy duty soldering gun and a multimeter from Harbor Freight. This project is starting to get some legs. Once the soldering iron arrives I can practice a bit on some cheap Fry's boards before starting the build on the controller.

Friday, February 12, 2010

First look at my future

Last weekend I spent some time with ERX (pronounced "irks" by my wife,) and discovered there are a few things I need to deal with. It is a 23 year old car after all. Mike, the guy I bought it from said I may need to get some new front fenders as there are some cracks. Well, I pulled off the bra on the front and I will definitely need to find new fenders. Unfortunately they don't sell them anymore, so I will have to spend some time at Pick-a-Part. I pulled the carpet out of the back and it looks like there is a leak somewhere. It rained quite a bit last week so there was water around the spare tire. Also, either the battery died or I am out of fuel, cause the the car won't start now. When it did start, it sounded like the timing was off or a spark plug wasn't firing or something like that. Very uneven sounding idle.

I pulled some of the tinting off the back window and will probably scratch the rest off this weekend. I also pulled off the pinstripes because I didn't like them. ERX is gonna need a new paint job eventually, but not sure if that will happen right away. First I need to get the engine running smoothly so I can sell it. This weekend I will be cleaning as much out of the garage as possible and hopefully my friend James will be able to come over at some point and we can try to figure out the engine trouble.

Monday, February 1, 2010

It has officially begun

The CRX is in the backyard. Now I need to clean out the garage just to think about beginning as I don't think my wife will like a half disassembled vehicle sitting in the backyard. I am still trying to figure out a lot of stuff and where to begin. I have one EV conversion book and am thinking about getting Gavin's EV manuals and DVDs. I'll ask around and see if its worth it. I am also planning on asking many questions in the various EV forums.

Saturday, January 30, 2010

Checked out the Rex

I went to check out the CRX today. We couldn't get our schedules to work out well during the week. It looks like it will work great. There is some paint and scratches to deal with, but for the most part everything was there and the tranny and clutch were very smooth. He couldn't find the title after his last move, so we are going to the DMV on Monday and get a replacement title and transfer it to me. I am very excited but also know there is so much to learn and do with this project. I have already had a few questions answered from some great people on the diyelectriccar.com forum as well as read a bunch of posts pertaining to the type of system I want to install. Here's to hoping the title is clean and the transfer goes smoothly. I am going to pay him $1000 for the car. He recently installed a Cat and a clutch, so maybe I can get a decent price for the cat. We'll see what I can get for the old 1.5L carbureted engine.

Tuesday, January 26, 2010

Hopes and Dreams

I am planning to convert a Honda CRX from an internal combustion engine to an electric motor. Right now, I am waiting for a call back on a prospective donor car, a 1986 CRX HF. This is a very light weight 2 seater which will be a perfect commuter car for me. The plan is to put in LiFePo4 batteries and an Impulse 9 motor with either a Zilla controller or maybe the new Netgain controller. We'll see how it turns out. I would like to keep it under 12k at the most and preferably under 10k if possible. A lot depends on how big a battery pack I put in.